Snowflake Connector Configuration#
Snowflake is a cloud-based data warehouse for storing, processing, and analysing large datasets using SQL.
To setup your Snowflake Connector:
- Name: Enter a name for the connector to identify it within your app.
- Data Source Slug: Create a unique identifier for the connector to reference it within the app.
- Description (Optional): Provide a brief description to explain the connector's purpose or details. This helps you manage multiple connectors.
- Account Identifier: Account identifier, used to form the connection URL.
- Database warehouse (Optional): Specify the warehouse to use for query execution.
- Database name (Optional): The name of the database in your account that you want to access.
- Database Schema (Optional): Define the schema within the database that holds the data you'll be querying.
- User Role (Optional): Provide the role the connector should use when executing queries.
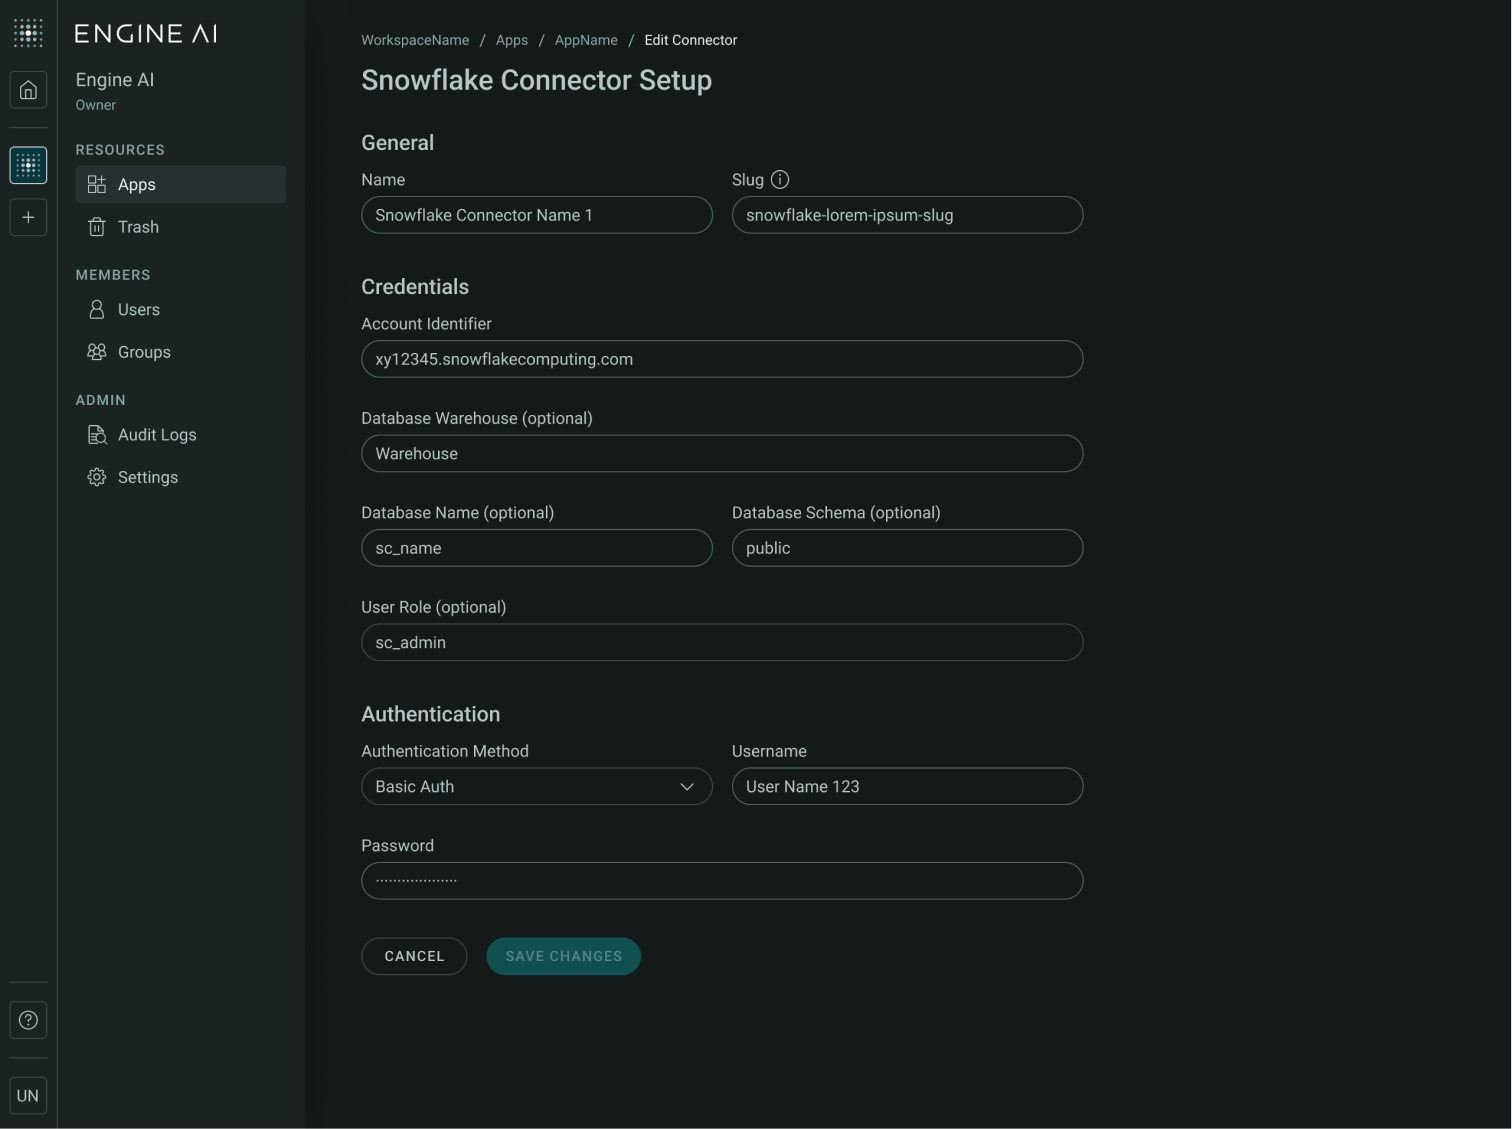
Authentication setup: Choose your Authentication Method which suit your security requirement. Basic Authentication will be settle by default, use the dropdown to select the Key pair method.
- Basic Authentication: Use your Snowflake username and password to authenticate. This method is straightforward and commonly used for standard access.
- Username: Your Snowflake account Username.
- Password: Your corresponding Password.
- Key pair Method: This method provides enhanced security by using an SSL private key to establish a secure connection. It's recommended for production environments or when higher security is required.
- Username: Your Snowflake account username.
- Private Key: Paste your SSL private key, used to authenticate securely with Snowflake.
- Passphrase(Optional):If your private key is protected by a passphrase, enter it here to unlock the key.
Note
The passphrase is encrypted on the server side for security and cannot be retrieved once saved.
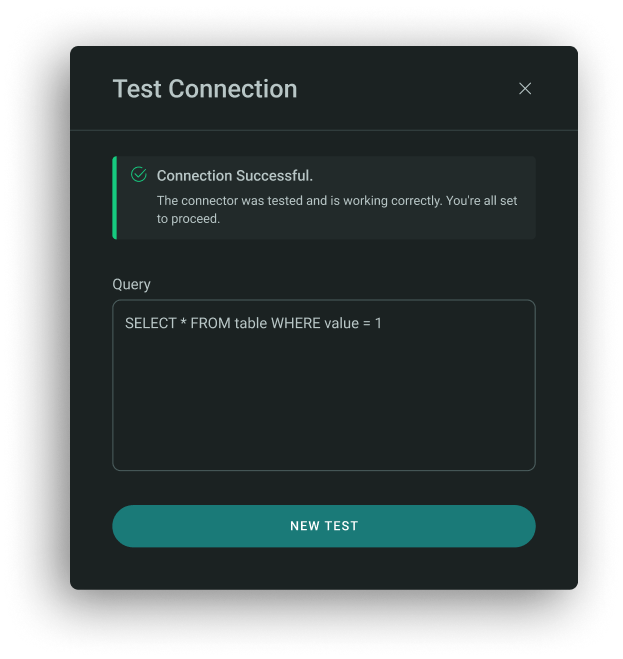
Testing Connection#
You can test the connection of the connector while creating or editing it. To test Snowflake connector you need to enter a valid SQL query using a schema you have access to.
Example:
SELECT * FROM my_table LIMIT 10;