App Permissions#
On this page we’ll cover the App Permission page, their Permission rules, and how to change them.
To manage permissions, navigate to the permissions option in the app menu.
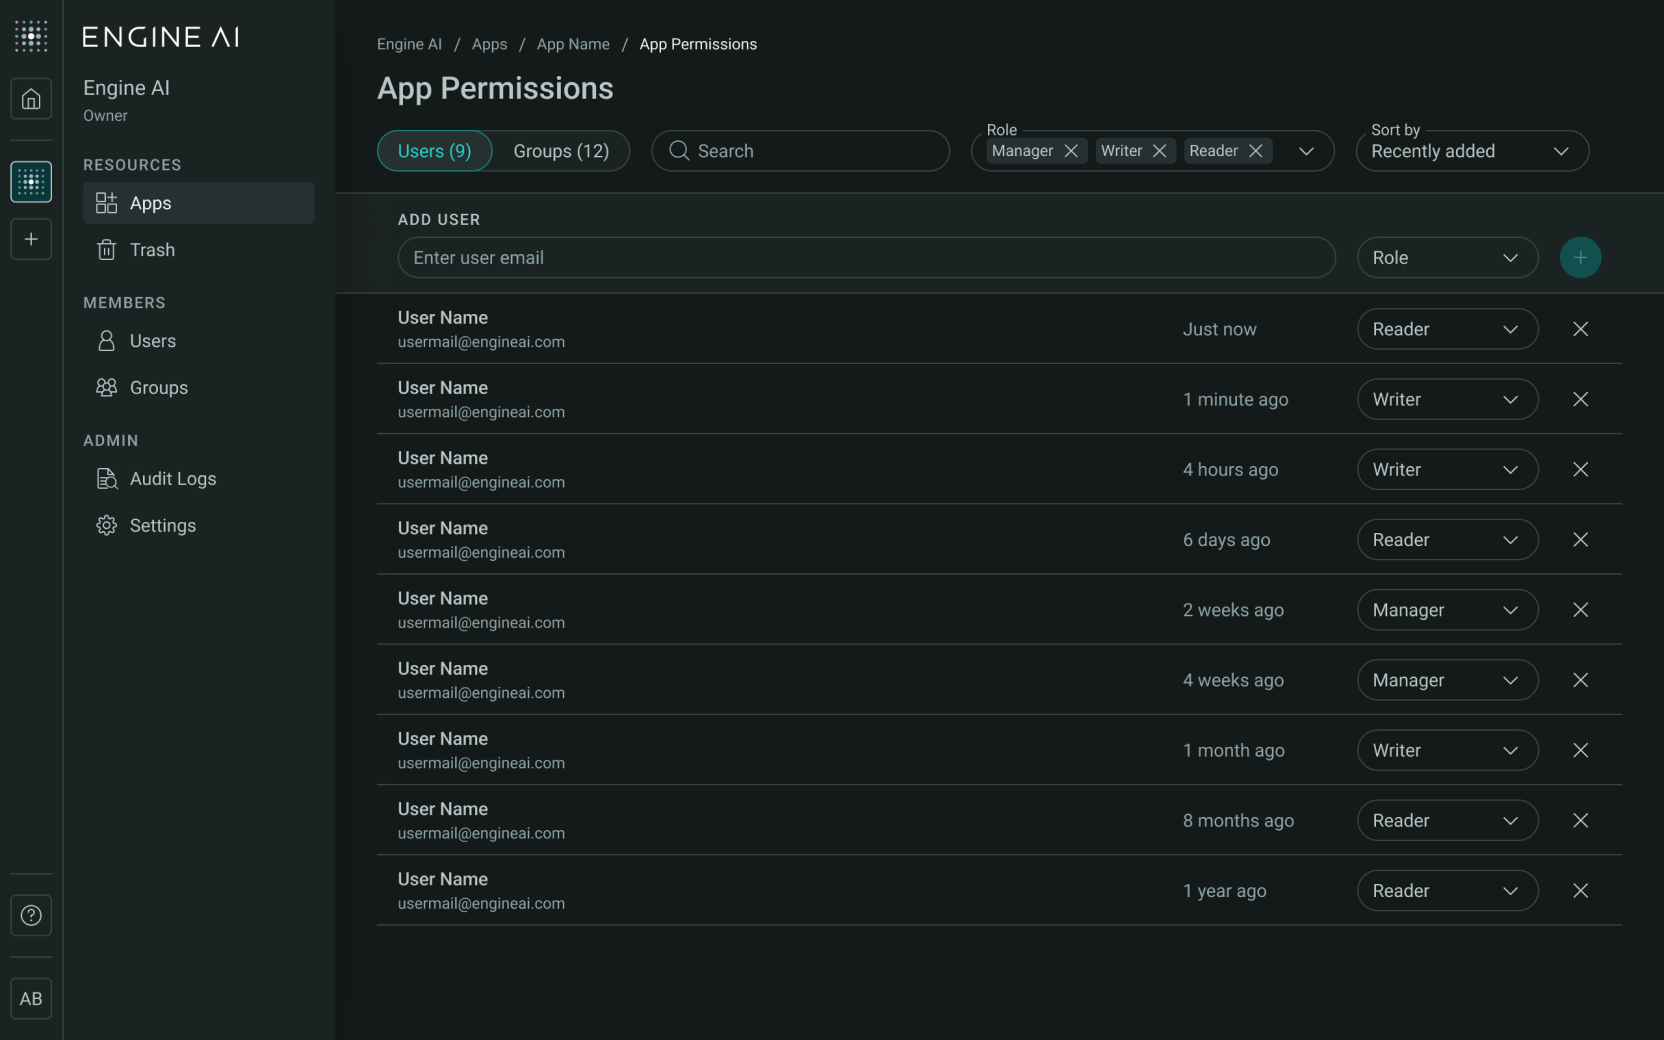
Permissions Page#
Here’s a breakdown of what you can do:
-
Permissions List: Shows the current permission rules, displaying either Users or Groups based on the selected tab.
-
Users Tab: View and manage permissions for individual users.
-
Groups Tab: View and manage permissions for groups. You can create new groups to simplify managing permissions for multiple users at once.
-
-
Search Bar:
-
Use this to quickly find users or groups with existing permissions.
-
You search users by name or by email.
-
-
Role Filter:
-
A multi-select dropdown where you can filter permissions by role: Manager, Writer, or Reader.
-
By default, all permission roles are selected.
-
Filtering will only affect the displayed results.
-
-
Sort Options:
-
Sort the permissions list by Name or by Recent Activity.
-
You can apply both the Role Filter and Sort Options simultaneously.
-
-
Add New Rule:
-
Use this section to assign new permissions by entering a user’s email or a group name and selecting a role.
-
For more details on adding users or creating groups, please view the Adding a New Rule section.
-
App Permissions Rules#
App Permissions Rules let Managers assign roles to users or groups, defining their actions within the app, such as managing resources, creating content, or viewing data.
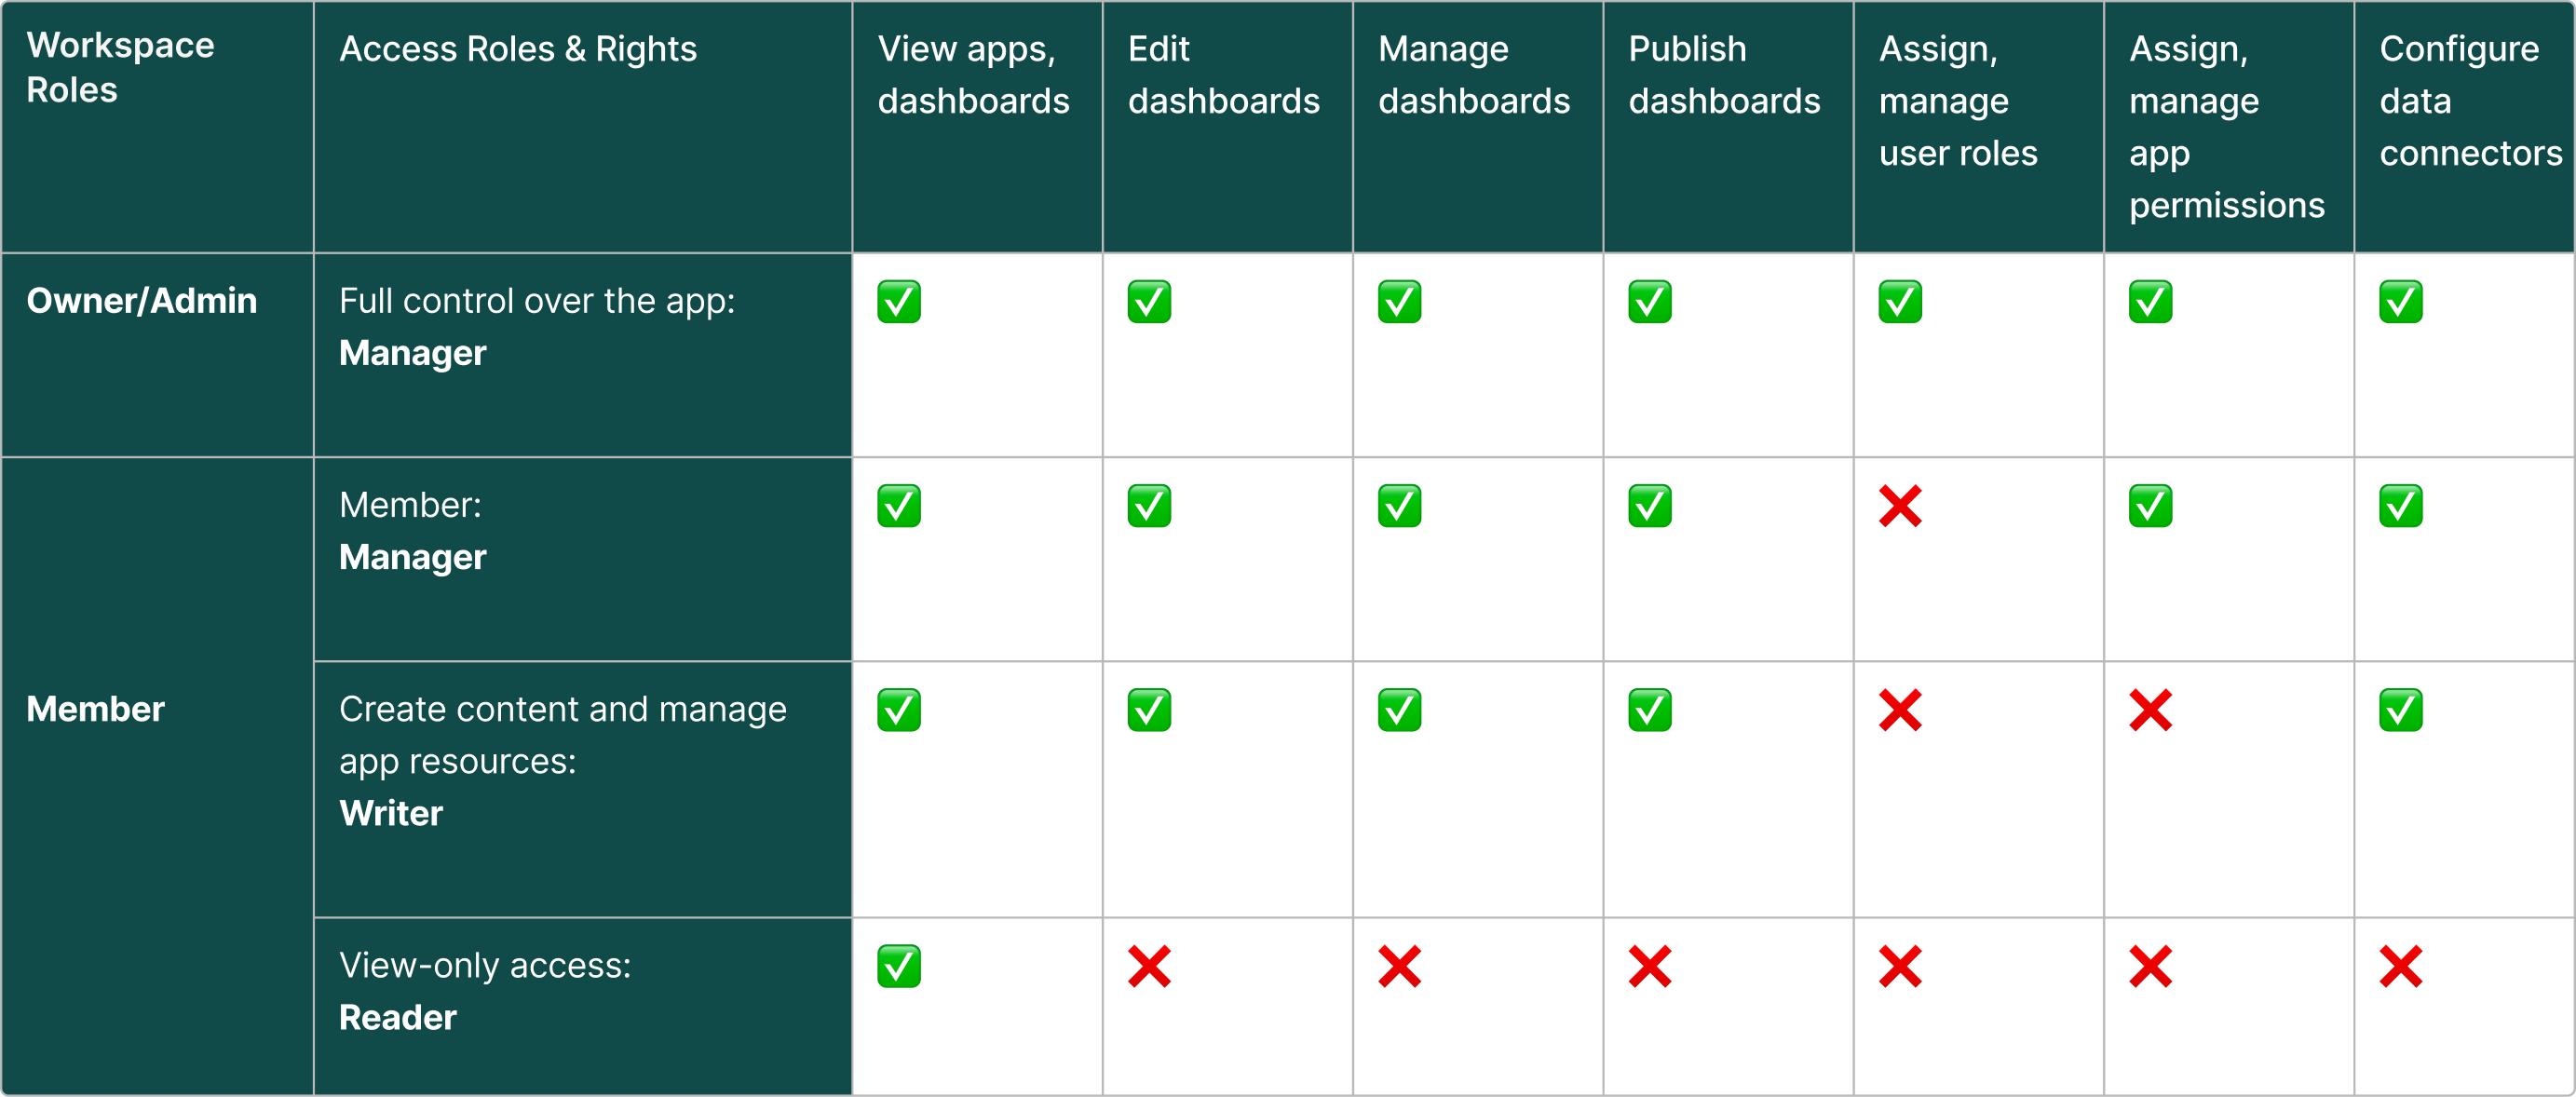
While App Permissions (Manager, Writer, Reader) are specific to each app, Workspace Roles (Owner, Admin, Member) apply across the Workspace itself.
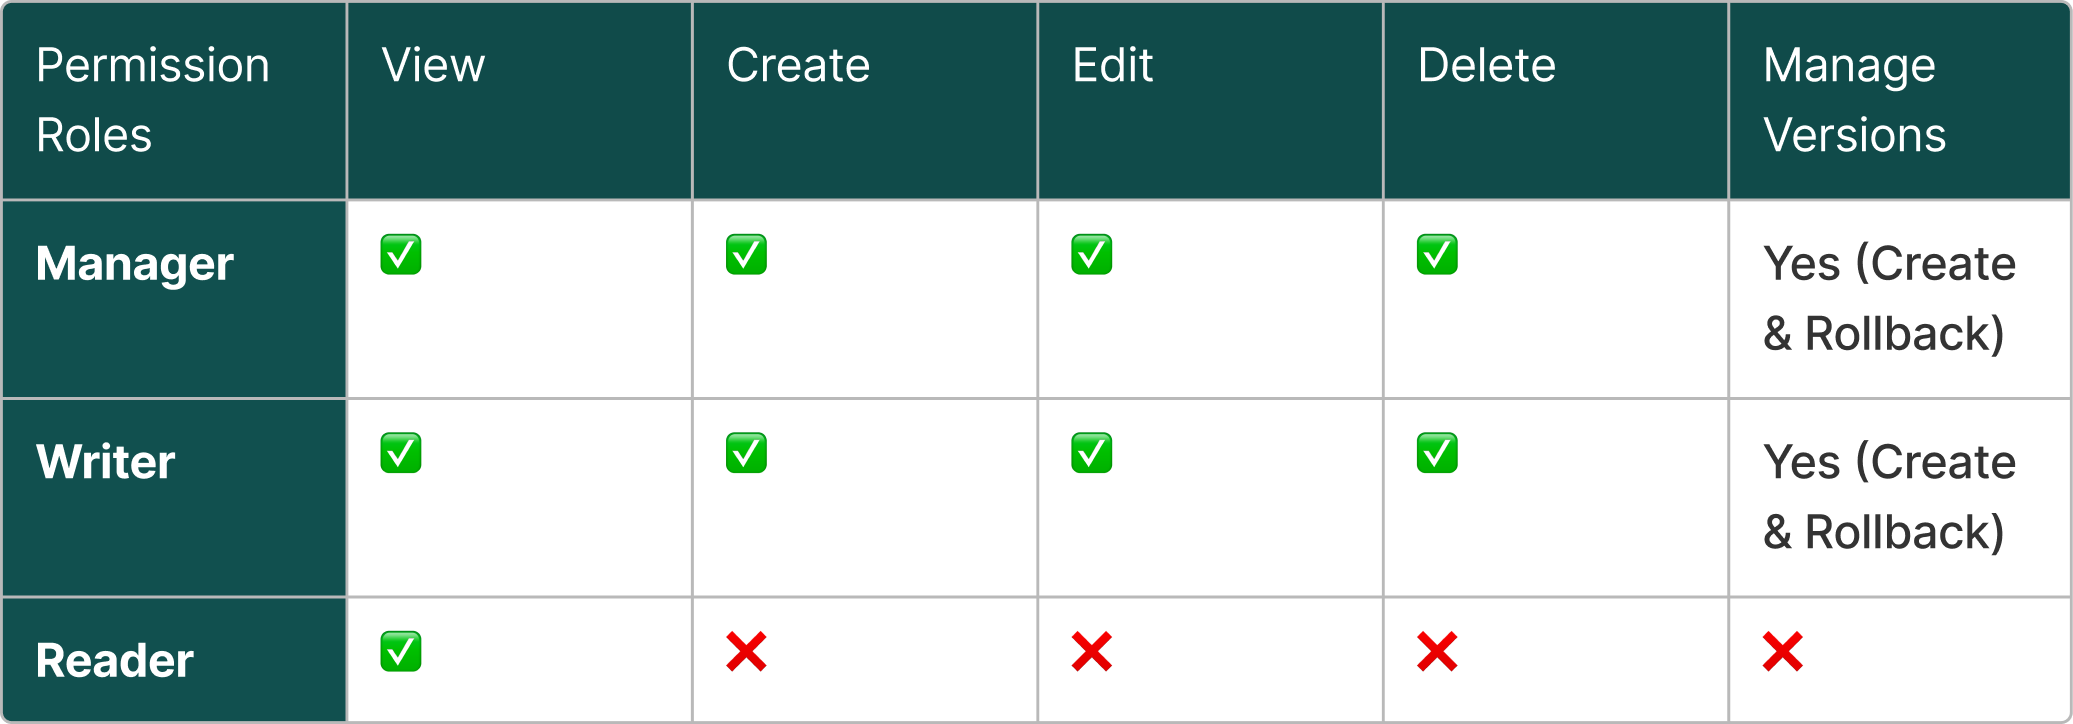
There are three permissions roles that can be assigned, each with different access rights:
Adding New Rules#
To ensure control over access, managers can define specific rules for users, who can be assigned:
- Individual Permissions: that are directly assigned to the user.
- Group Permissions: which are inherited from the user’s groups.
- Workspace Role: Admins & Owners inherit Manager permissions for all apps, overriding other permissions.
These rules enable managers to fine-tune access based on individual, group, and workspace-level roles.
Priority Hierarchy: When a user has permissions from multiple sources, the system applies the highest level of access. For example, a user with Reader permissions from a group and Writer permissions individually will have Writer access.
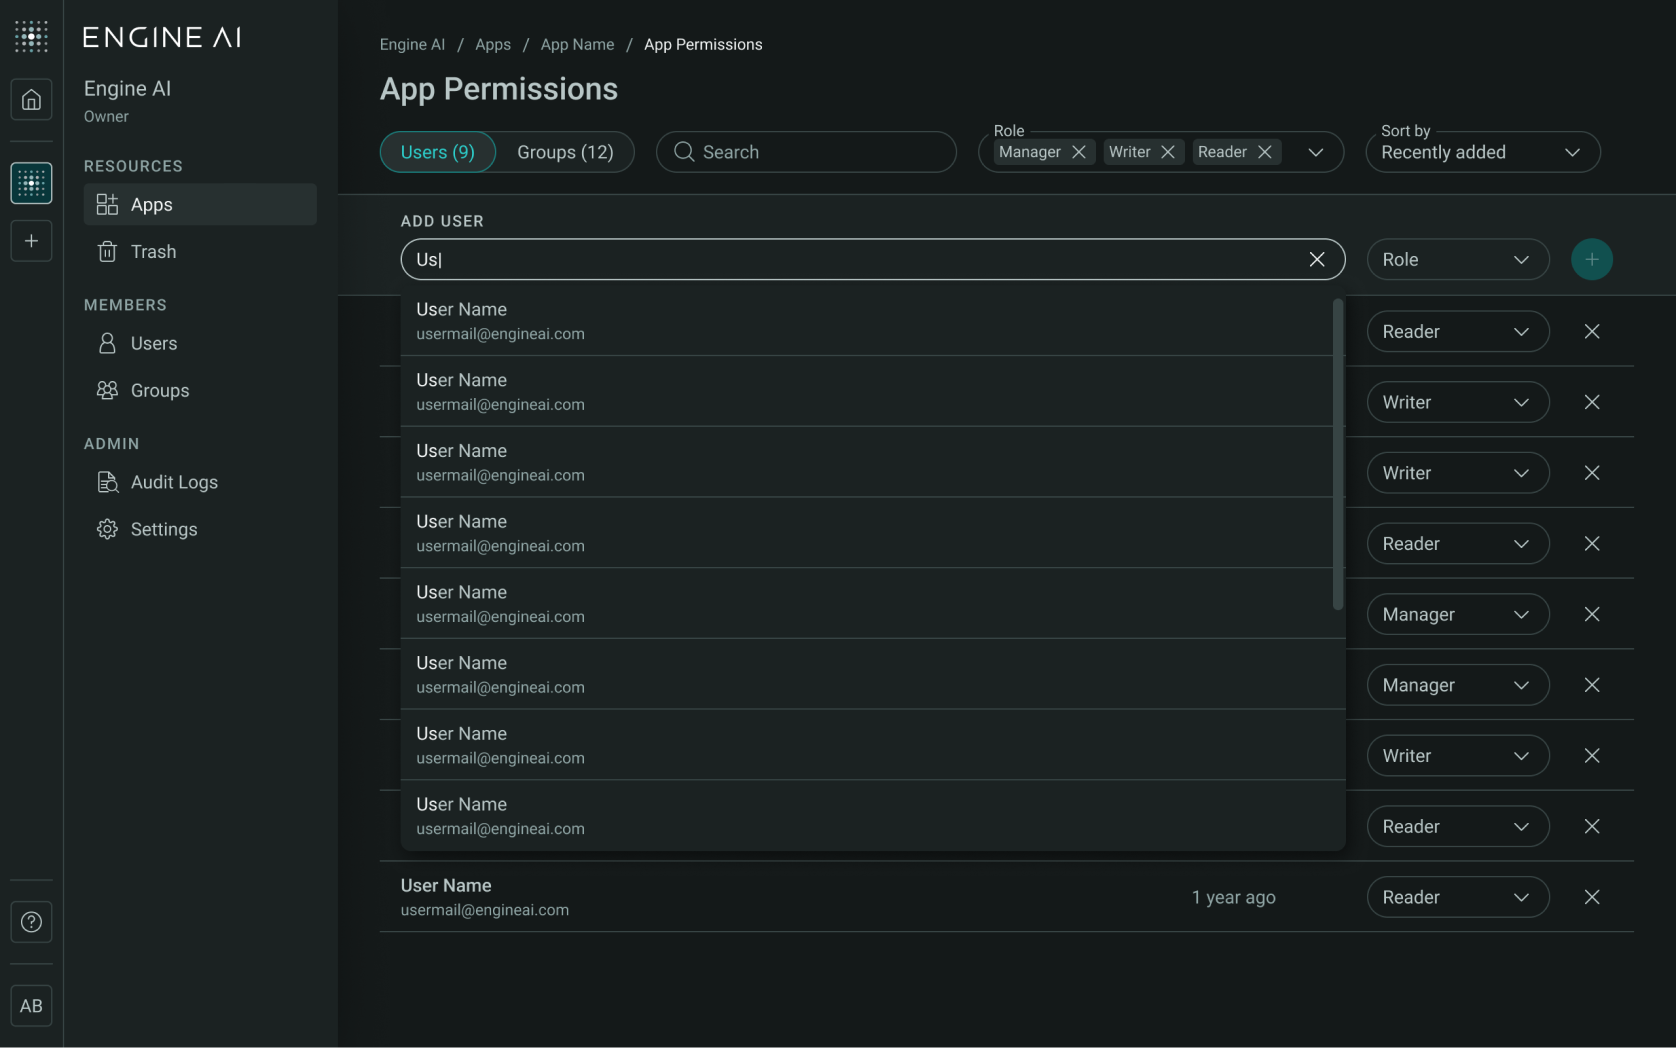
Before adding a rule, the Admin must choose whether to assign it to a user or a group by selecting the appropriate tab (Users or Groups) in the App Permissions section. Once selected:
-
Search for and select a user or group by typing an email or group name.
-
Choose a role (Manager, Writer, or Reader) from the dropdown.
-
Once the user/group and role are selected, the Add New Rule button will become active, click it to add the new rule to the list.
Note
If the user or group you selected already has the assigned role, this rule won’t be added again. This is because the rule is already in place. If you chose to keep the current role, no changes are necessary, and the rule remains unchanged.
Managing Rules#
To remove a rule:
-
To remove a user or group rule, click the Remove Rule button next to the assigned rule.
-
A confirmation modal will appear to ensure you want to proceed with the removal. Once confirmed, the rule will be permanently removed from the user or group.
App Permissions and Workspace Role Dependencies#
Workspace Roles serve as the primary level of access control, determining a user’s overall permissions within the Workspace. App Permissions build upon this foundation, adding a more granular layer of access specific to each application. While Workspace Roles grant initial access to the Workspace, App Permissions refine and extend what a user can do within individual apps.